 CN Sweaters
A V neck cardigan can pass flat measurement and still hang badly. The neckline may grow into a soft U, the two fronts may become different lengths, the top button may pull the V point sideways, or the placket may ripple after finishing. When worn open, the same cardigan can swing away from the body or show a stepped hem.
These faults are connected. The V edge, front plackets, buttonholes, buttons and lower hem form one continuous frame around the front opening. Altering trim tension or button pitch in one area changes how that frame carries weight elsewhere. A chest measurement and V depth do not control the system.
This guide gives buyers a practical way to specify that front frame. It covers edge length, trim construction, V-point treatment, placket stability, open and closed balance, size-set rules, sample evidence, bulk drift and the records needed for repeat orders.
What Must the Product Brief Lock?
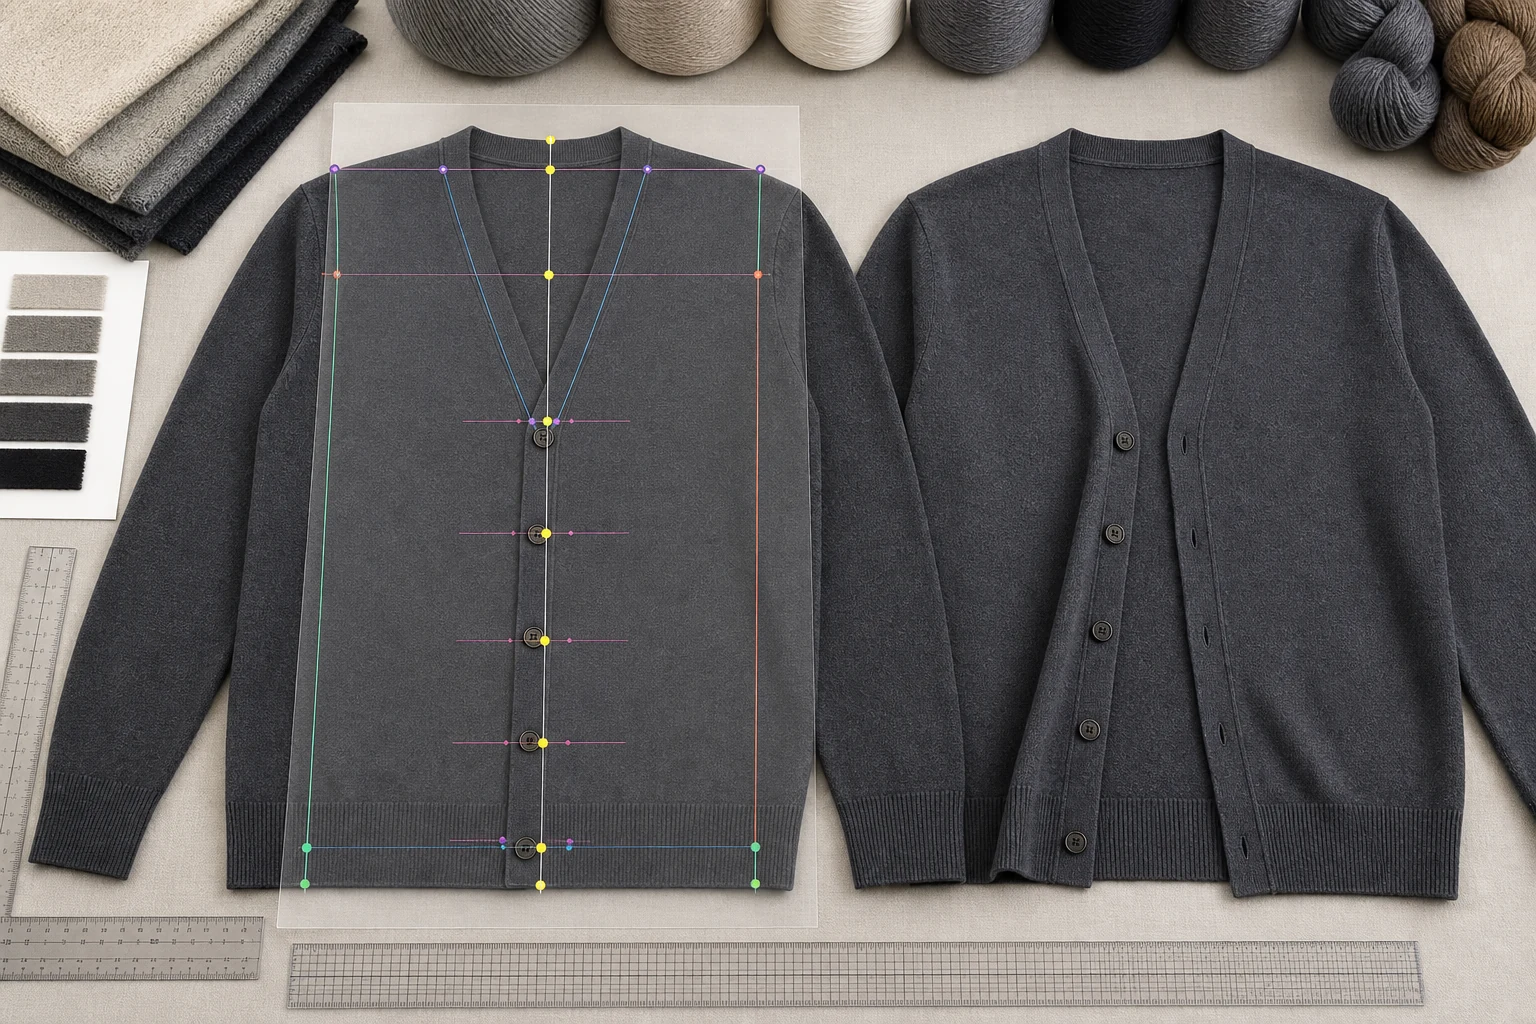
Start by defining how the V neck cardigan will be worn. State whether it is a fitted next-to-skin layer, a classic shirt-layering style or a relaxed outer cardigan. Name the primary wearing condition and the intended button use. A style designed to stay closed needs different front-edge control from one expected to hang open most of the day.
Draw the front frame as one system
Create a full front drawing with centre front, shoulder-neck points, V point, front hem points, button centres and buttonholes. Show the cardigan both open and closed. The closed view reveals button strain and placket overlap. The open view reveals edge flare, front rotation and hem steps.
Define the V point from a stable garment landmark. A useful file might give high-shoulder-point to V point, centre-back-neck to V point along the edge, and V point to top button. Add placket width, buttonhole length and direction, overlap, button diameter, button pitch and bottom-button-to-hem distance.
ISO 18890:2018, confirmed current in 2024, defines main garment measurement points and allows interested parties to add others. Use it as a measurement-method reference, then illustrate every cardigan-specific point that the standard table does not settle. The sweater measurement chart guide can help keep method sketches beside the specification.
Set open and closed pass conditions
For the closed condition, decide the acceptable overlap, gaping between buttons, V-point symmetry, front length difference and button load. For the open condition, decide acceptable edge roll, flare, twist and hem step. Photograph the approved base size in both states after a stated rest period.
Avoid comments such as “make the front cleaner.” A useful correction changes an edge length, trim program, attachment instruction, reinforcement location, button position or finishing condition. Record which change solved the fault so the next sample does not combine several untested fixes.
How Should the V Edge Be Engineered?
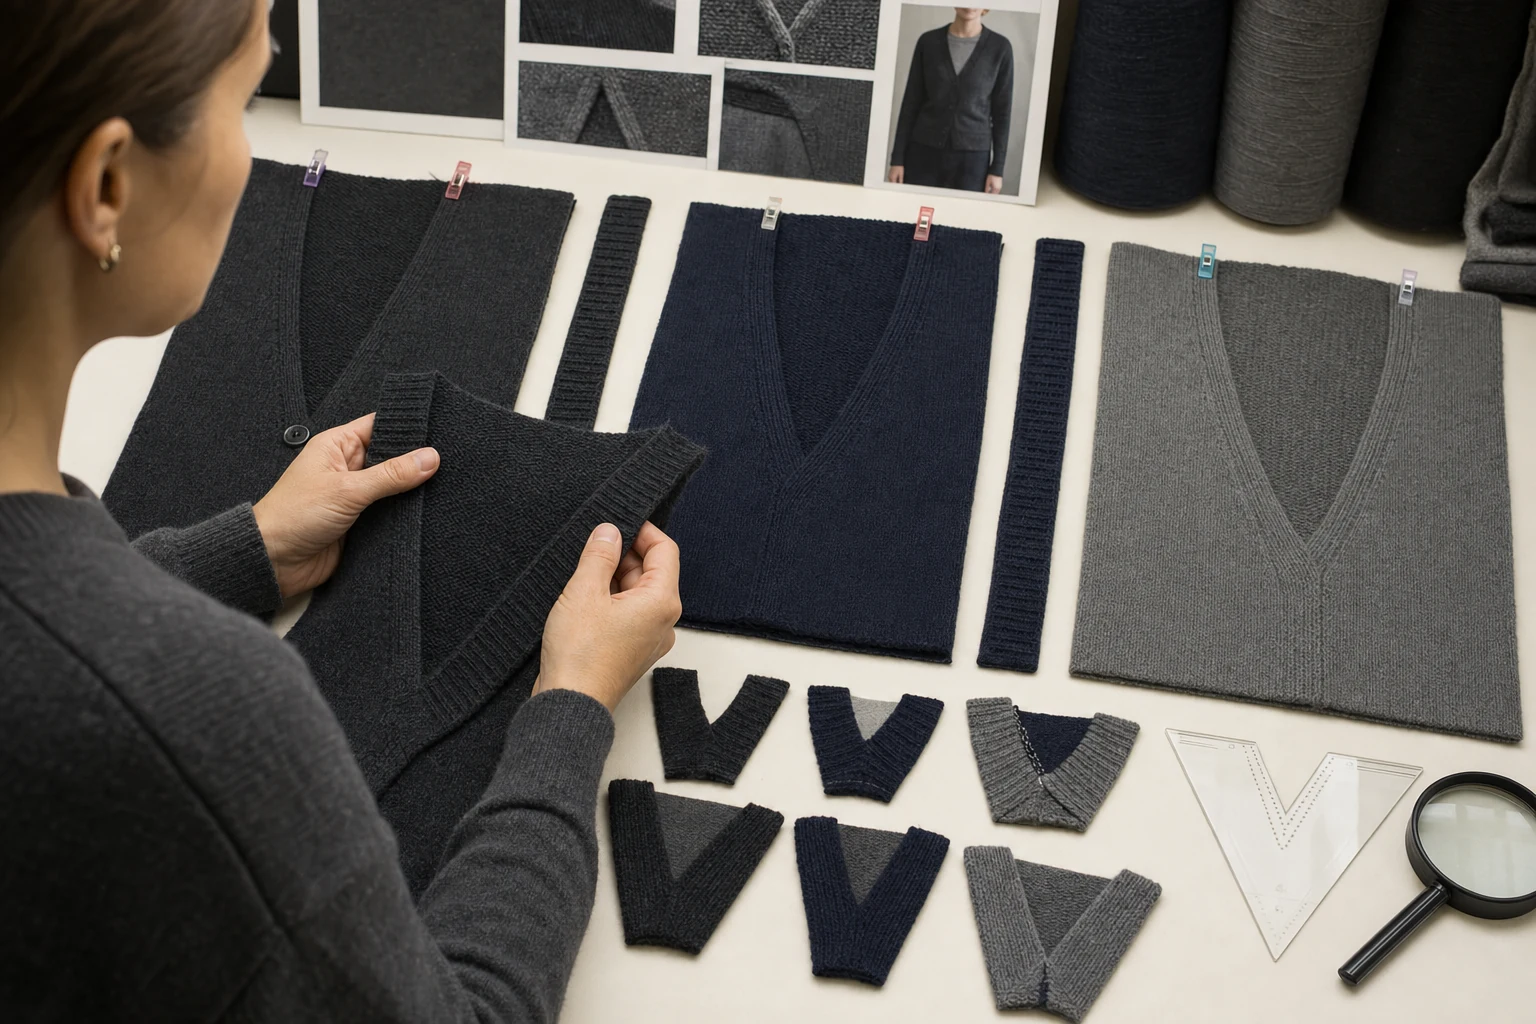
The neckline edge has its own material, structure, relaxed length and attachment route. Treat it as a component even when it is knitted from the body yarn. The technical file should identify whether the edge is a separately knitted and linked rib, a picked-up structure, an integral fully fashioned edge or another defined route.
Control edge length against the body opening
Measure the body neckline opening before trim attachment and the relaxed trim before attachment. Record the intended relationship rather than leaving the linker to “fit it in.” A shorter trim can stabilise the edge, but excessive reduction pulls the shoulder-neck area, shortens the front and distorts the V point. A trim that is too long waves or grows during wear.
Keep left and right edge lengths separate. One total number can hide asymmetry caused by shaping, linking or handling. Mark distribution points at the shoulder, upper V, lower V and point so any controlled fullness is placed consistently.
The body fabric and trim may stretch differently. ASTM D2594-20 covers stretch and growth of low-power knitted fabrics under defined loading, while ISO 20932-1:2018 describes strip or loop methods for fabric elasticity. Neither standard automatically gives a cardigan pass value. Use an agreed method to compare the proposed trim and body, then confirm the assembled edge on the garment.
Review the linking-quality guide when specifying stitch pickup, seam elasticity and repair limits. The attachment must extend with the edge without leaving holes, broken loops or a hard line.
Build a repeatable V point
The V point concentrates shaping, trim joins and visual alignment. Define whether the trim is mitred, overlapped, joined at centre front or engineered through another approved construction. Show the face and inside. State the acceptable join width, bulk, stitch exposure and centre offset.
Use a full-size V template with shoulder-neck points, edge line and V-point angle. A V-depth measurement alone does not control the curve or angle. Check the template on a rested garment without pulling the neckline into place.
Add a reinforcement only when the construction needs it. A tape, thread route or local stitch change can stop point growth, but it can also create a hard spot that causes the adjacent edge to bend. Approve the local solution after dressing and wear movement, not from a flat photograph.
How Should Plackets and Buttons Work Together?
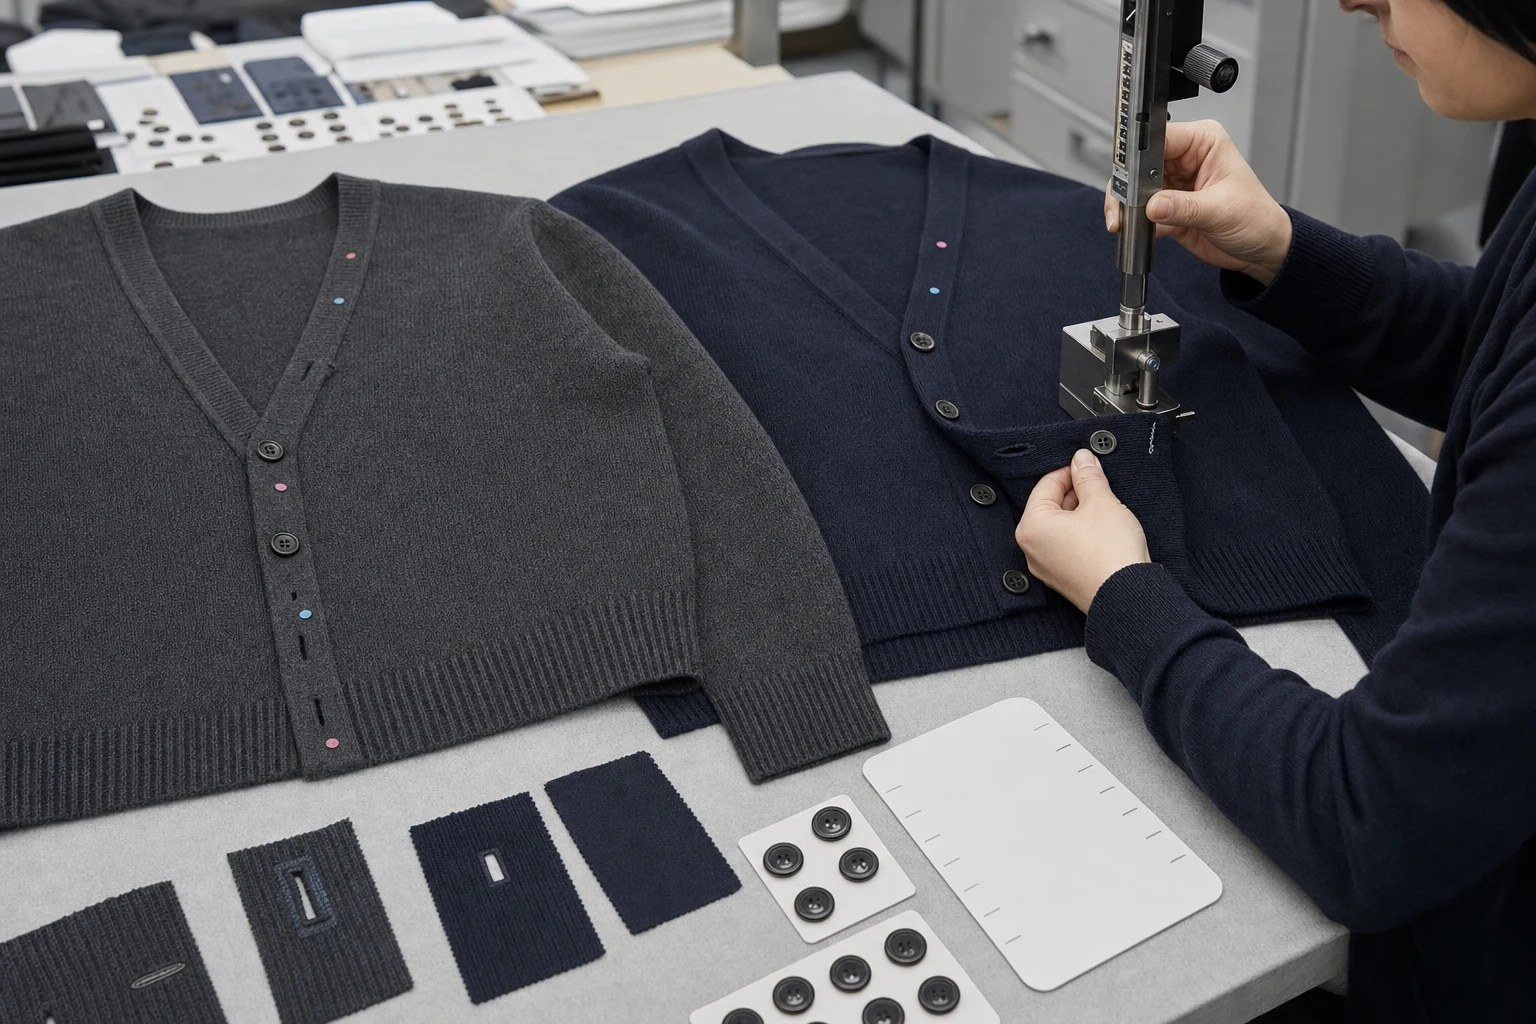
The two front plackets must match in length, width and firmness while performing different jobs. One carries buttonholes and the other carries buttons. Their local stiffness, added thread and openings can make them react differently after washing and steaming.
Specify the placket cross-section
Draw the placket cross-section or knitting structure. Identify single or double layer, rib or tubular construction, any backing or reinforcement, attachment route and finished width. Record width at the chest, waist and lower body if the design changes through the length.
Measure the left and right front edges separately from the shoulder-neck point to hem under the same rest condition. Add front hem alignment when the cardigan is closed and when it hangs open. The custom cardigan construction guide is a useful background reference, but the order file still needs this style’s exact placket route.
Buttonholes need size, direction and finishing instructions. Test them with the production button. An opening can look neat when empty but stretch, fray or distort the placket during repeated use. Keep the top buttonhole far enough from the V point to avoid pulling the neckline join, unless the design deliberately uses that load.
Set pitch from function and visual rhythm
Button pitch should be dimensioned from stable landmarks. Define top button to V point, pitch between each button and bottom button to hem. If the style uses unequal spacing, list every centre position. “Evenly spaced” creates ambiguity when garment length changes by size.
The button attachment must be specified separately from the button’s own strength. ASTM D6644-01(2025) measures tension strength of the bridge of sew-through flange buttons. It does not prove that the button is securely attached to a knitted placket. The supplier should agree a garment attachment test, load direction, hold time, specimen count and acceptance level for the actual button, thread, shank and reinforcement.
Use the pre-production sample review to record buttonhole operation, attachment, placket width and front alignment before bulk. Retain a button board that identifies the approved button article, colour, diameter, thickness and thread route.
How Should the Size Set Protect Front Balance?
Grading must address the body and front frame separately. Chest width can increase while V depth, edge length, button count and pitch follow different rules. A proportional scale can move the top button too low or create an overly deep neckline in upper sizes.
Grade the V line and closure map
List the grade increments for V depth, edge length, placket width, top-button position, pitch and bottom clearance. Decide whether button count stays fixed. If garment length increases but button count does not, show where the extra length is distributed. If a button is added, define the first size that uses the new closure map.
Compare the V line to the wearer’s chest and layering condition. The same garment V depth can look different as shoulder width, bust or chest projection and front length change. Check lower, base and upper sizes on representative fit forms or wearers.
Use the custom knitwear size-grading guide to separate base-size proportion from grading evidence. Select the sizes where a trim program, button count or shaping rule changes. Those transition sizes carry more information than a habitual middle-size set.
Diagnose a bad rule before changing finishing
A grading error repeats by size. A process fault follows a yarn lot, machine, linker, placket batch or finishing batch. Keep those identities on every size-set and bulk measurement report.
For example, a V point that becomes progressively lower from size to size suggests the grade rule. A wavy edge limited to one colour or wash batch suggests material or finishing. A single front longer across several sizes may point to attachment handling or asymmetric steam.
The size-drift production guide provides a broader method for grouping measurements. Add cardigan-specific edge and closure points so the team can see whether the front frame or the body block moved.
What Should Samples and Tests Prove?
Each sample should answer a named question. Repeating a complete cardigan after several simultaneous changes makes it hard to know which correction worked.
Use component trials before a full garment
The following sequence keeps development evidence focused:
| Sample | Question it should answer | Release evidence |
|---|---|---|
| Body and trim knit-down | Do density, hand, stretch and recovery work together? | Conditioned measurements and agreed extension/recovery result |
| V-point and edge trial | Can the trim attach without holes, bulk, wave or a hard point? | Face, inside, full-size template and extension check |
| Placket and buttonhole mock-up | Do width, opening, button and reinforcement operate together? | Button cycle, attachment result and rested placket measurement |
| Base-size fit cardigan | Does the front frame balance open and closed? | Wear photographs, front lengths, edge line and hem alignment |
| Risk-based size set | Do grade transitions preserve the frame? | Lower, base, upper or transition-size comparison |
Assign a code to every sample and tie it to yarn lot, colour, size, trim program, button article, date and finishing route. Keep rejected component trials because they explain why the approved construction exists.
Test after use and care
Run repeated button opening and closing, dressing, reaching, sitting and open-wear hanging. Measure the edge and plackets before action, immediately after and after a stated rest. Look for residual V growth, buttonhole elongation, join damage, front rotation and hem steps.
For washable programs, ISO 5077:2007 provides a method reference for dimensional change after specified washing and drying procedures. The order must still name the procedure, cycles, measurement preparation, rest time and acceptance limits. Measure left edge, right edge and body length separately so a stable total length does not hide an unbalanced front.
Use the knitwear testing guide to connect laboratory work with garment wear review. A strip result can compare materials; only the assembled cardigan reveals how edge, placket, buttons and body interact.
How Should Cost and Bulk Release Be Controlled?
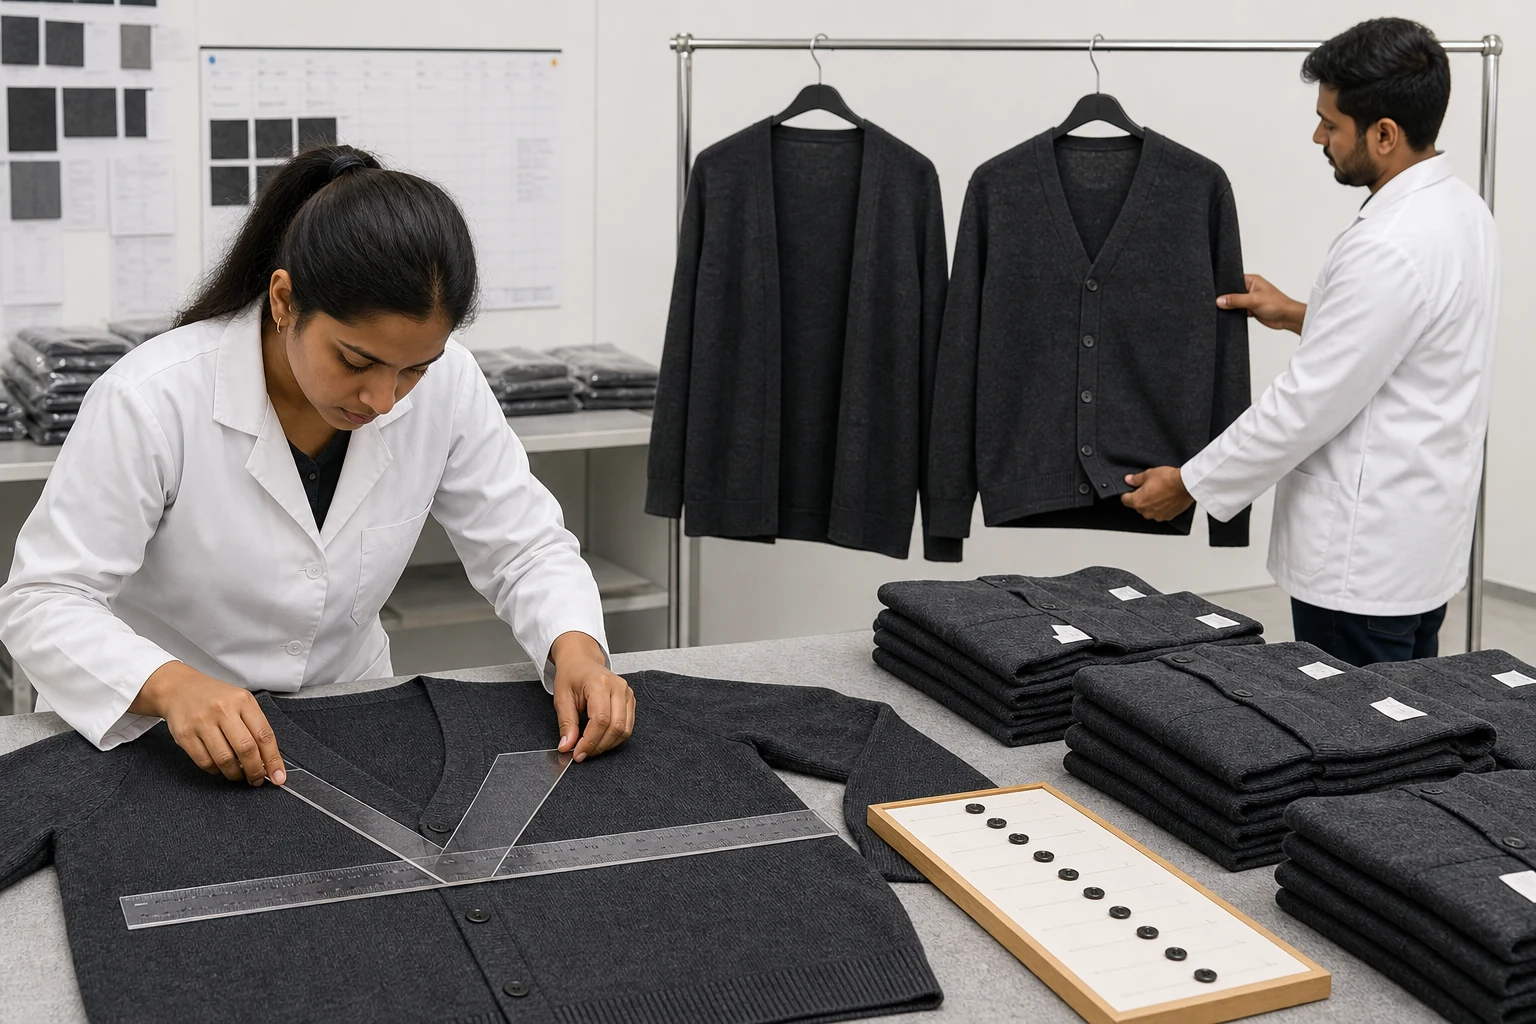
The quote should price the approved front frame. Ask the supplier to separate trim knitting, linking or pickup, V-point handling, placket structure, buttonhole work, buttons, attachment, reinforcement, size-specific programs and expected rework.
Compare construction scenarios
A fully linked trim may require more component control and linking time. An integral or picked-up route changes programming and handling. A double-layer placket uses more yarn and may need more finishing control than a single layer. Compare the evidence required by each route, not the nominal unit price alone.
The custom knitwear cost-driver guide can organise fixed development and variable production cost. Add the number of trim programs, button minimum, sample matrix and first-off groups. If a route works only when the order absorbs high rework, it is not a stable cost solution.
Release a conditioned first-off
Approve a first-off from the intended yarn, body program, trim program, placket route, buttons and finishing batch. Check body measurements first, then V depth, left and right edge length, placket width, V-point offset, top-button position, button pitch, buttonhole condition and open/closed hem alignment.
Use a full-size V template and retained button board. Check the inside as well as the face. Photograph the cardigan buttoned, unbuttoned and hanging open after rest. A steamed unit that passes on the table but changes within hours has not proved process stability.
Set in-line checks by size, colour, yarn lot, machine, linker or operator group and finishing batch. The measurement-tolerance guide can define numerical boundaries, but the inspection plan also needs warning rules for edge wave, V-point bulk and placket twist.
When results move, hold the affected subgroup and identify the source. Do not blend reworked, damp or unconditioned units into a measurement sample. Recheck them under the approved rest condition before release.
What Must Be Archived for Reorders?
The reorder package should contain the full-size V template, body-neck opening measurement, relaxed trim lengths, trim program or construction record, attachment distribution points, V-point construction, placket cross-section, closure map and button board.
Preserve the working standard
Retain an approved first-off or sealed sample with its yarn lot, machine, linker or operator group, finishing batch and inspection results. Store face and inside photographs. Note whether the physical standard has been washed, worn or steamed after approval.
Keep left and right edge measurements, not just a total. Archive lower, base and upper size evidence when they use different trim or closure rules. The bulk consistency guide can hold the wider production trail; add the front-frame records that make this cardigan identifiable.
Reopen only affected gates
Before a repeat order, request changes in body yarn, trim yarn, density, machine program, linking route, placket reinforcement, button, attachment thread, finishing and size range. A changed button article needs the buttonhole and attachment checks. A changed yarn or density needs trim/body comparison and a conditioned first-off. A new size needs a closure-map decision.
Compare the new first-off to the retained template, button board and measurement trend. If the supplier says the construction is unchanged, the source records should prove what “unchanged” means.
Conclusion
V neck cardigan control starts by treating the neckline, plackets, buttons and hem as one front frame. Specify the body opening, relaxed trim lengths, distribution points, V-point construction, placket cross-section and closure map. Approve the cardigan open and closed because the same defect can appear differently in each state.
Use component trials to settle trim attachment, V point and buttonholes before repeating full garments. Grade edge length and button positions independently from chest and body length. In bulk, trend left and right edge measurements with size, yarn, machine, operator and finishing identities so the team can distinguish a bad grade rule from process drift.
For reorders, retain the V template, trim record, closure map, button board and conditioned first-off. Reopen the exact checks affected by a new material, route, button or size instead of relying on an old photograph.
Frequently Asked Questions
What causes a V neckline to wave?
Common causes include excessive trim length, uneven distribution, different body and trim recovery, attachment tension or finishing. Measure the body opening and relaxed trim, then inspect distribution by section instead of shortening the whole edge without diagnosis.
Is V depth enough to control the neckline?
No. V depth locates one point. Edge length, curve, angle, shoulder-neck position and V-point construction decide the actual line. Use a full-size template with separate left and right edge measurements.
Should button pitch stay the same in every size?
It can, but garment length and V position may change. Define top-button position, every pitch and bottom clearance by size. If button count changes, sample the first size that uses the new closure map.
Which sample should be approved before the fit cardigan?
Approve a body-and-trim knit-down, a V-point edge trial and a placket/buttonhole mock-up. These pieces isolate material, attachment and closure faults before they are mixed with full-garment fit.
When does a repeat order need another first-off?
A new body or trim yarn, density, machine program, linking route, placket reinforcement, button, finishing route or size family should reopen the relevant checks. Document the change and compare the new unit to the retained template and button board.