 CN Sweaters
An oversized pullover is not a regular sweater made one or two sizes larger. A successful style has intentional ease, a controlled shoulder position, balanced sleeve reach, enough structure to hold its silhouette and a grading system that preserves those relationships across the collection.
When a buyer sends only a reference image and the instruction “make it oversized,” the factory must guess which proportions matter. One sample may have the right width but excessive sleeve length. Another may look relaxed from the front while collapsing at the back neck. A heavier yarn may create the desired volume on the table but grow vertically after finishing and wear.
The safer approach is to define the product as a system: target body, intended ease, body shape, shoulder architecture, sleeve construction, length, yarn, gauge, stitch density, finished weight, edge recovery, wash behavior and approved size range. This guide explains how brand teams can turn that system into a production-ready brief for a custom pullover sweater.
Define What “Oversized” Means for the Collection
The first decision is commercial. An oversized pullover for a unisex streetwear capsule may need a different silhouette, weight and size architecture from a soft women’s layering knit or a premium men’s weekend collection.
Write a measurable fit statement
Describe the target customer, market, season, wearing layer, silhouette and visual anchors. A useful statement might specify a relaxed rectangular body, dropped shoulder, controlled sleeve volume, hip-length hem and enough neck structure to support the garment weight.
Then convert the statement into measurements and relationships. Record the target body or fit model, finished chest, hem, shoulder or cross-shoulder position, body length, armhole depth, bicep, cuff and sleeve reach. State whether the hem should sit straight, blouse slightly over the rib or narrow visibly.
Keep three concepts separate:
- Body measurements describe the intended wearer.
- Garment measurements describe the finished sweater.
- Ease is the planned difference, distributed according to the design.
ISO 8559-1:2017 provides current anthropometric definitions and principles for body measurement. ISO 8559-2:2025 addresses primary and secondary body dimensions for clothing size designation. Neither standard defines a universal oversized garment. The brand still decides how much ease to use and where it belongs.
Distinguish oversized, relaxed and incorrectly sized
A relaxed fit usually adds moderate room while keeping conventional shoulder and sleeve relationships. An oversized fit may deliberately move the shoulder, enlarge the body or increase sleeve volume. An incorrectly sized sweater simply loses control: the neckline shifts, cuffs cover the hands, the back neck falls away or the body grows without a coherent shape.
Approve front, side and back views. Check the garment standing and moving, both over the intended under-layer and in the intended styling position. A front photograph alone cannot prove shoulder balance, back length, arm mobility or sleeve reach.
If the collection includes several oversized pieces, define what should remain common. A shared fit block, neckline language, rib proportion or yarn platform can create brand coherence, while controlled changes in length, surface or color give each style its role.
Lock Yarn, Gauge, Stitch and Garment Weight
Oversized silhouettes use more material and expose more fabric surface. Yarn choice, gauge and stitch structure therefore affect not only handfeel and cost but also drape, growth, opacity, recovery and shipping weight.
Approve the material as a construction system
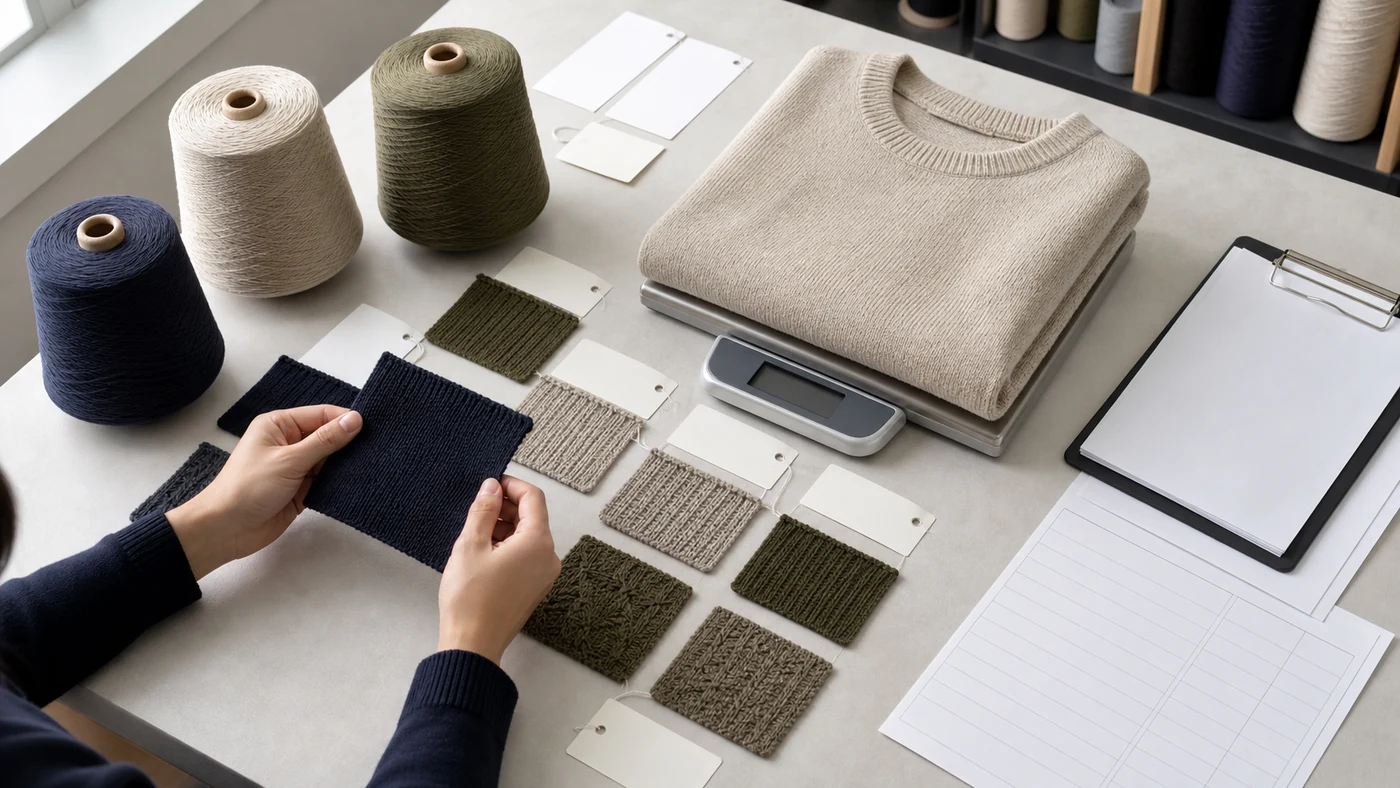
Record exact fiber percentages, yarn reference, count or ply, machine gauge, stitch structure, stitch density and finishing route. Add the finished garment weight in a named size and define the measurement condition.
A soft yarn is not automatically suitable. A low-twist or heavy construction may stretch under its own mass. A very light construction may look empty at the shoulder or become transparent when the wide body hangs. Rib, cable, tuck and jacquard structures can change weight and recovery even when the nominal gauge is unchanged.
Use labeled swatches to compare viable combinations, then approve a full garment. The custom sweater gauge guide helps buyers understand how gauge affects appearance, manufacturing and product positioning, but the final decision must be tested in the intended yarn and silhouette.
Use finished weight as a control, not a design shortcut
Garment weight can help compare samples and detect unexpected material or density changes. It does not replace yarn, gauge, stitch and measurement specifications. Two sweaters with similar weight can distribute mass differently and hang differently.
Check whether the body pulls down from the shoulder, whether sleeves lengthen during wear and whether rib edges can recover after being stretched. Evaluate the sample after the agreed relaxation period, after factory finishing and after the relevant care test.
If a supplier proposes a lighter yarn, looser density or different blend to meet price, treat it as a construction revision. Reassess opacity, handfeel, dimensions, recovery, pilling risk and visual volume instead of accepting the same sketch with a lower number on the quote.
Specify the Body, Shoulder and Sleeve Relationship
The body, shoulder and sleeve must be engineered together. Most oversized-fit failures occur when one dimension is changed without recalculating the others.
Choose the shoulder architecture deliberately
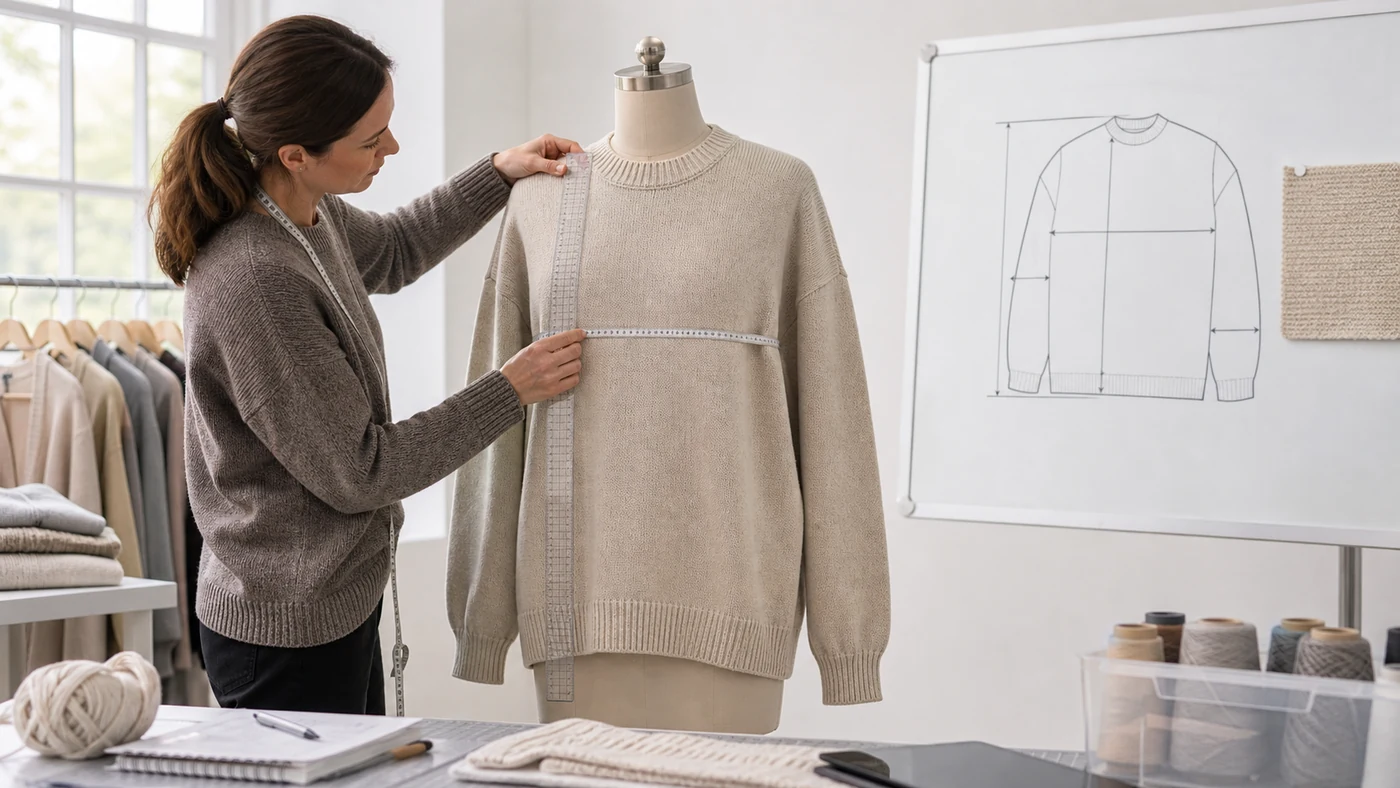
Identify whether the style uses set-in sleeves, a dropped shoulder, raglan construction or another engineered shape. For a drop shoulder, specify the intended shoulder line or cross-shoulder width and evaluate where the seam sits on the target body.
The further the shoulder drops, the more the body panel contributes to apparent sleeve reach. Sleeve length measured only from the shoulder seam can therefore be misleading. Add a center-back-neck-to-cuff or another agreed total-reach measurement when it better controls the customer experience.
ISO 18890:2018 defines principal garment measurement points and methods and allows parties to agree additional points. The tech pack should show every method with diagrams, including garment state, fastening, lay-flat position and relaxation time.
Balance width, armhole, bicep and cuff
Do not let a wide chest conceal a narrow sleeve. Check armhole depth, bicep, elbow area and cuff opening against the intended layer and mobility. An oversized body with a restrictive upper sleeve is visually and functionally inconsistent.
Conversely, excessive armhole depth or sleeve volume can create drag, bunching and poor movement. Test reaching forward, lifting the arms and bending the elbows. Observe whether the body rises excessively and whether the cuff remains functional.
Define front and back body length, not only one overall length, when shoulder slope, neckline or posture creates a visible difference. Review side seam balance and hem level from the side. An oversized pullover should look intentionally proportioned, not pulled backward by its own weight.
Control Neckline, Rib and Edge Recovery
The neckline and ribs stabilize a large knitted surface. If they are under-specified, the sweater can look tired before the body measurements fail.
Match the neck structure to garment mass
Specify neck shape, opening width and depth, rib height, attachment method and recovery expectation. A heavy oversized knit can pull a weak crew neck outward or make the back neck stand away from the body.
Check the neckline after dressing, wear simulation, finishing and laundering. Inspect symmetry, attachment stretch, seam bulk and whether the opening returns after passing over the head. If the style is intended for unisex use, confirm that the opening works for the intended range without becoming visually oversized at the smaller end.
Treat hem and cuff ribs as functional components
Record relaxed and stretched dimensions where useful, rib structure, depth and attachment ratio or technical equivalent. Decide whether the hem should pull in, hang straight or create a blouson effect.
The cuff must balance sleeve volume and practical hand clearance. A loose cuff can let the sleeve fall over the hand; an aggressive cuff can create excessive gathering. Inspect rib recovery and the transition between the sleeve and cuff across the size range.
Approve rib yarn, stitch and finishing together with the main body. A substitution that looks close in color can still change stretch and recovery.
Build a Graded Measurement Chart
The graded chart must preserve the design logic across sizes. Applying the same increment to every point can turn the smaller size into a regular fit and the larger size into an uncontrolled mass of fabric.
Decide what scales and what remains visually stable
Choose a base size linked to the brand’s target body and sales strategy. Then decide how chest, hem, length, shoulder, armhole, bicep, sleeve reach, cuff and neck opening change.
Some oversized styles keep shoulder movement relatively controlled while adding more body width. Others maintain a strong proportional drop across the range. There is no universal rule. Use the target population, intended ease and construction to establish the graded values.
The CNSweaters guide to grading custom knit sweaters explains why oversized and regular fits need different logic. Knit loops, stitch counts, gauge, finishing and fixed pattern repeats constrain the increments the factory can execute.
| Specification area | Buyer decision | Approval evidence |
|---|---|---|
| Target body | Market, body profile and base size | Named data or brand block |
| Oversized intent | Ease and silhouette by size | Fit statement and photographs |
| Body shape | Chest, hem, front/back length | Full graded chart |
| Shoulder system | Construction and seam position | Base and size-set fit records |
| Sleeve reach | Shoulder contribution, sleeve and cuff | Total-reach and mobility checks |
| Material | Fiber, yarn, gauge, stitch and density | Labeled swatch and sealed sample |
| Finished weight | Target size and condition | Recorded sample weight |
| Recovery | Neck, hem and cuff behavior | Stretch, wear and wash review |
| Bulk tolerance | Point-specific acceptance | Signed specification |
Define methods and tolerances point by point
For each point of measure, include a code, name, diagram, method, value for every size, unit and tolerance. State whether it is a pre-wash, post-wash or finished-and-relaxed target.
Do not copy one blanket tolerance across the garment. Measurement sensitivity and manufacturing variation differ by point, gauge and structure. The buyer and factory should agree realistic tolerances while protecting high-risk features such as neckline, total sleeve reach and body length.
Version-control the chart. Accepted fit comments must be converted into measurements and construction notes before the next sample or bulk release.
Approve Fit and Size-Set Samples
A correct base sample does not prove a correct range. The size set tests whether the oversized relationship survives at representative lower and upper sizes.
Fit the base sample in its real use case
Use the intended under-layer, target body or validated form and collection styling. Measure the sample first, then assess appearance and movement. Record actual values and consistent front, side and back photographs.
Review neckline position, shoulder drop, chest and hem volume, body length, back balance, armhole, sleeve reach and cuff. Confirm that the garment can be put on and removed without overstretching the neck and that normal movement does not pull the body into an unintended shape.
Select sizes that expose proportion drift
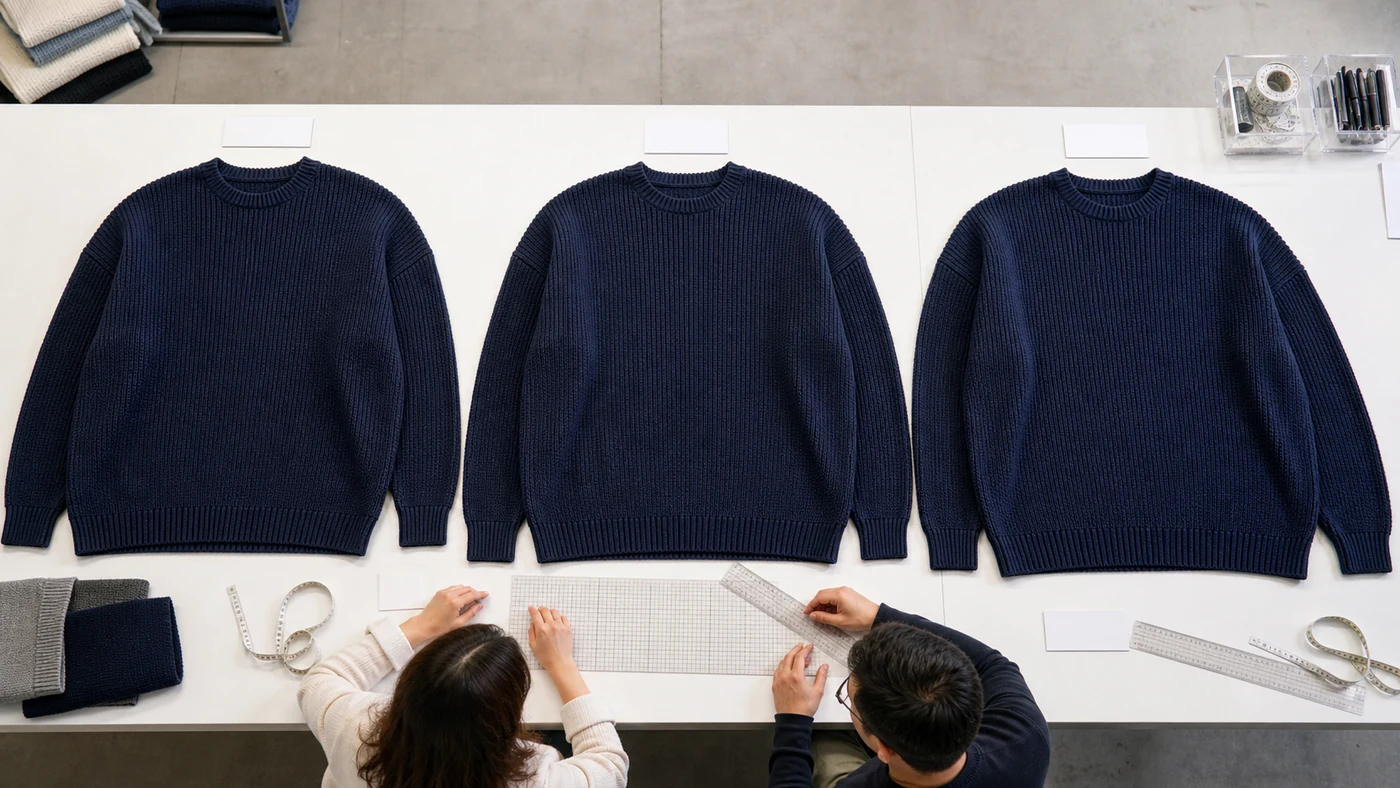
Include the base size and meaningful lower and upper sizes. Add a sample wherever the grading rule changes, a separate block begins or a stitch repeat constrains the dimensions.
Compare samples aligned at the same reference point. Look at ratios as well as numbers: shoulder to body width, sleeve volume to cuff, body length to width and neck opening to garment scale.
If the smaller size loses the oversized identity or the larger size becomes too long and heavy, revise the grading logic rather than forcing the base-size formula through the range.
Test Wash, Relaxation and Bulk Consistency
Finished dimensions depend on knitting, linking, washing, drying, steaming, pressing and relaxation. Oversized garments are especially sensitive because their mass can continue to redistribute after processing.
Define the complete measurement condition
State the relaxation time, surface, fastening and preparation before measurement. Record dimensions and weight at the agreed stages. For care testing, name the wash and drying procedure, number of cycles, conditioning and acceptance criteria.
ISO 6330:2021 specifies current domestic washing and drying procedures for textile testing. ISO 5077:2007 covers determination of dimensional change after washing and drying. A standard procedure does not set the buyer’s required result; the specification must still define what change is acceptable.
Review width, front and back length, total sleeve reach, neckline, shoulder position, torque, rib recovery, handfeel and surface appearance. Compare the garment after it has rested, not only immediately after drying or pressing.
Translate approvals into production controls
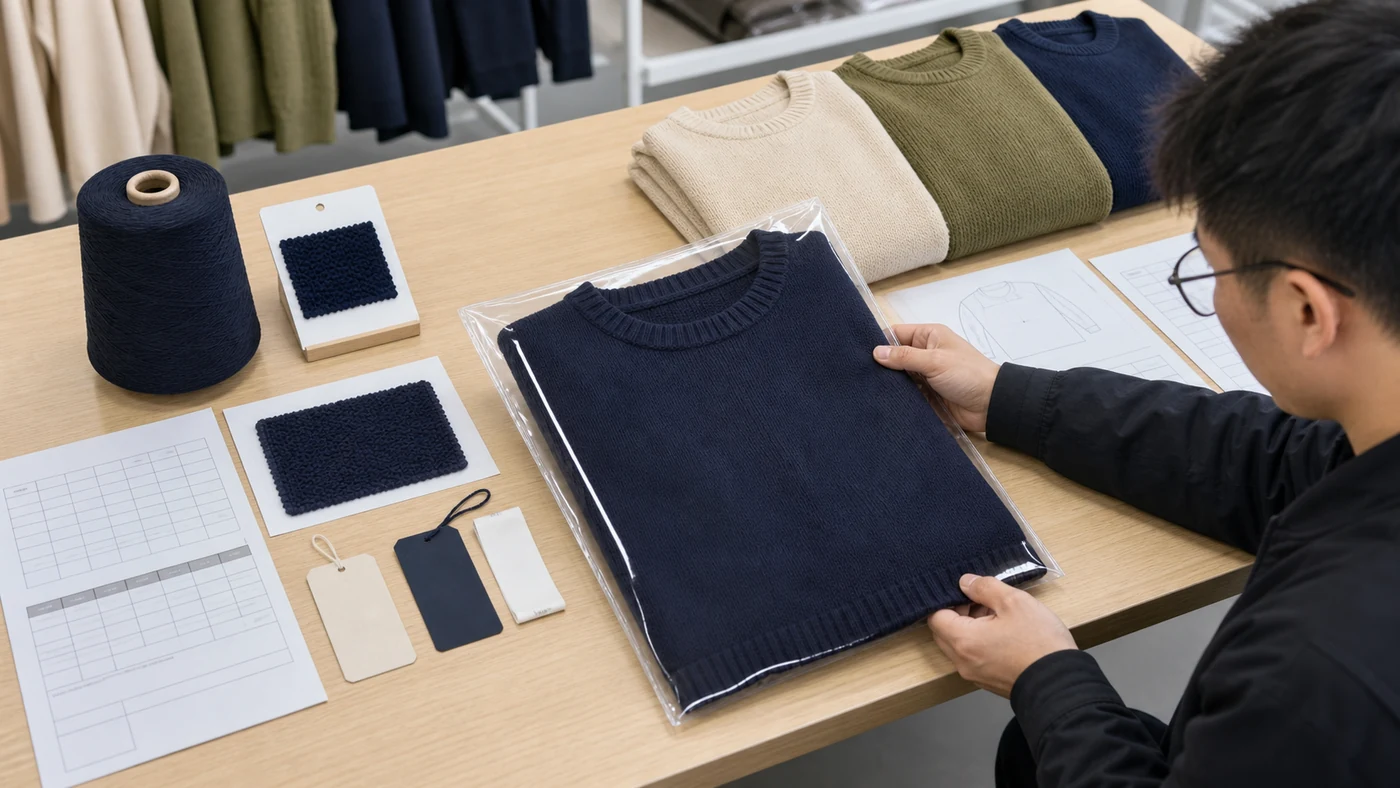
Seal a pre-production sample made with production-intent yarn, construction, trims and finishing. Store its actual measurements, weight and wash record with the final tech pack.
During bulk, monitor yarn lot, gauge, stitch density, panel dimensions, linking, wash recipe, finishing and final measurements. Sample across sizes and colors according to risk. A middle size from the easiest color cannot represent the entire order.
If a bulk correction changes steaming or blocking, confirm that the adjustment does not mask a construction problem or create instability after the garment relaxes.
Prepare the Product for Retail and Reorders
Product approval includes the information and materials needed to sell, inspect and reproduce the oversized pullover.
Align product claims and customer fit information
Ensure composition, care labels, size labels, product descriptions and photography agree with the approved garment. Explain the intended fit using useful product measurements or model information according to the brand’s customer policy.
A private-label sweater program also needs approved neck labels, care labels, hangtags, stickers, polybags and carton requirements. Check that label placement does not distort the neck and that folding and packaging do not permanently crease a bulky construction.
Create a repeatable product pack
Keep the final specification, graded chart, measurement diagrams, yarn and shade references, swatches, stitch details, garment weight, wash recipe, size-set records, sealed PP sample, labels, packaging, inspection report and approved deviations.
After launch, review returns, fit comments and sell-through by size where reliable data exists. Separate fit problems from buy-allocation problems. Create a controlled revision for improvements rather than overwriting the original record.
The brand collection becomes stronger when each new product builds on proven materials, fit blocks and approval evidence. Buyers can use the broader CNSweaters product categories to plan compatible pullovers, cardigans and other knitwear without losing style-specific specifications.
Conclusion
An oversized pullover succeeds when its proportions are intentional and repeatable. Define the customer, wearing use and silhouette first, then translate “oversized” into measurable ease, shoulder position, sleeve reach, length and edge behavior.
Lock yarn, gauge, stitch density, finishing and finished garment weight as one material system. Build a graded chart that preserves the oversized identity across representative sizes, and approve the size set in production-intent construction.
Finally, verify relaxation, laundering and bulk finishing against a sealed standard. The result is not merely a large sweater. It is a controlled brand product that can be explained to customers, inspected in production and reproduced for the next order.
Related CNSweaters Resources
- Custom Pullover Sweaters
- Custom Sweater Gauge Guide
- How to Grade Sizes for Custom Knit Sweaters
- Private Label Sweater Manufacturing
- CNSweaters Product Categories
Developing an Oversized Pullover?
Send the target market, season, body data, base size, intended ease, reference images, yarn, gauge, stitch, garment weight, measurements, size range, wash route, branding, quantities and delivery date. The team can review a practical sampling and bulk-approval path.
FAQ
Is an oversized pullover just a larger regular sweater?
No. An oversized style intentionally controls body ease, shoulder position, armhole, sleeve volume, total reach, length and edges. Simply increasing a regular size often creates an unstable neckline, excessive sleeves or poor grading.
Which measurements are most important for a drop-shoulder sweater?
Control chest and hem width, shoulder or cross-shoulder position, front and back length, armhole, bicep, cuff, sleeve length and a total-reach measurement that includes the body’s contribution to the sleeve.
How should an oversized sweater be graded?
Build the rule from the target body, intended ease and construction. Decide which proportions scale and which should remain visually stable, then validate lower, base and upper size samples. Do not use a universal increment table.
Why should finished garment weight be specified?
Weight helps control material consumption and detect density or construction changes. It also influences drape and vertical growth. It must be used alongside yarn, gauge, stitch, dimensions and finishing specifications.
When is the style ready for bulk?
The style is ready when the final chart and production-intent samples agree; representative sizes pass fit, mobility, measurement and wash review; labels and packaging are approved; and the sealed PP pack reflects the product that bulk production will follow.