Most buyers think a sweater order starts when they send a tech pack. From a factory
perspective, it really starts much earlier—with yarn sourcing, machine calibration, and
a production sequence that has to run in the right order or the whole timeline shifts.
Understanding how sweaters are made isn’t just background knowledge. It directly affects
how you plan your sampling timeline, set realistic delivery expectations, and catch
quality problems before they become expensive. This article walks through the complete
sweater manufacturing process—all 12 steps—and flags where delays and defects tend to
concentrate, so you can work with your factory more effectively.
This is written for brand owners, wholesale buyers, and procurement managers sourcing
from Chinese knitwear factories, whether you’re placing a first order or evaluating a
new supplier.
Why the Production Process Matters to Buyers
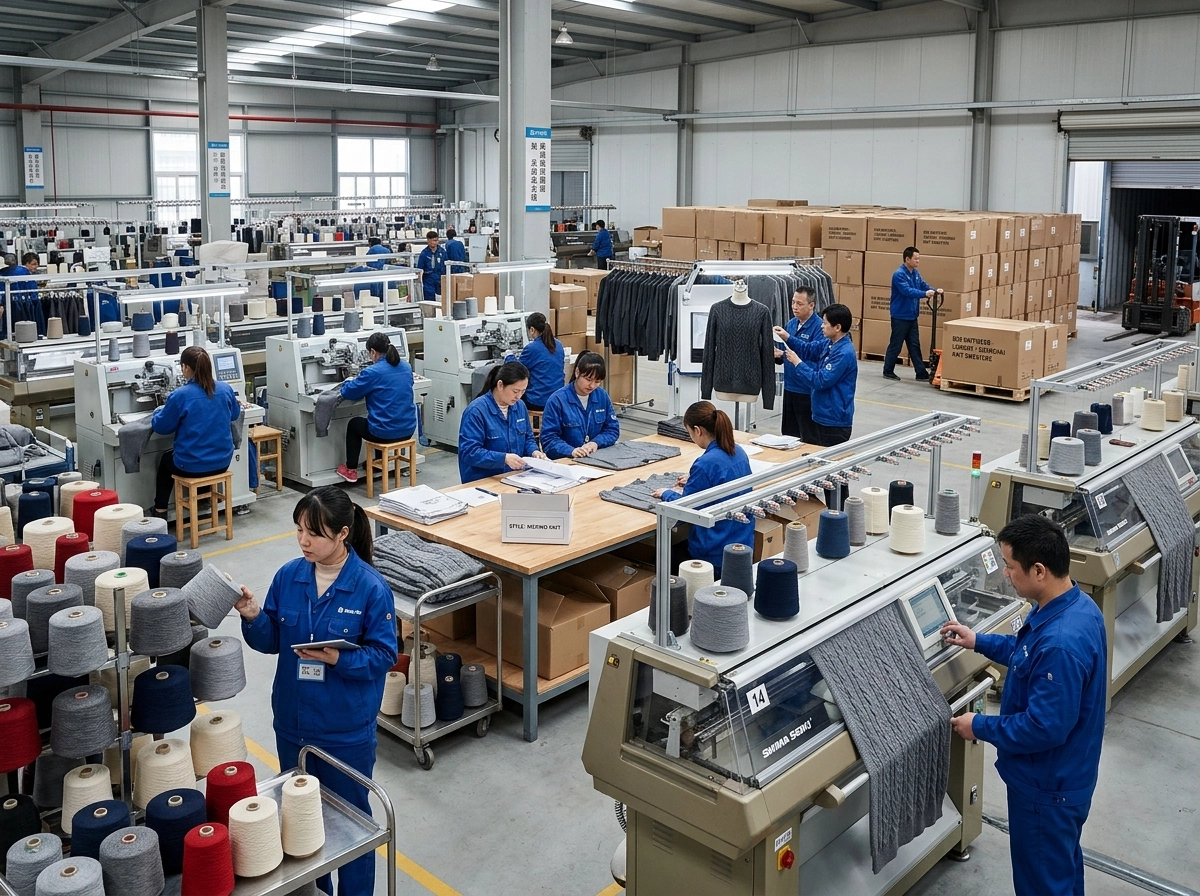
Sweater manufacturing is not linear in the way most buyers assume. It involves 12
distinct production stages, each requiring specific equipment, skilled workers, and—
critically—sequential handoffs. A problem at Step 4 doesn’t just delay Step 4. It
delays everything after it.
| Step | Stage | Key Risk or Note |
|---|---|---|
| 1 | Order Confirmation | Incomplete specs pause the entire timeline |
| 2 | Yarn Sourcing & Ordering | Lot mismatch if reorder is needed |
| 3 | Yarn Inspection & Storage | Specialty fibers add 1–2 days |
| 4 | Pattern Engineering & Size Grading | Errors propagate across the full run |
| 5 | Machine Knitting | Gauge determines speed and texture |
| 6 | Overlocking | Prevents unraveling before linking |
| 7 | Linking | Tension control = size consistency |
| 8 | Hand Stitching | Labor-intensive; varies by style |
| 9 | Garment Washing | Controls hand feel and pre-shrinkage |
| 10 | Ironing & Blocking on Templates | Template wear causes measurement drift |
| 11 | Labeling | Compliance risk if spec not finalized early |
| 12 | QC Inspection, Mending & Packing | Light-table needed for dark/fine-gauge |
What Has to Happen Before a Single Panel Gets Knitted
Before a knitting machine runs a single row, the factory needs a confirmed order with
complete specifications: style (pullover, cardigan, hoodie), quantity, full size run,
color references, an approved pre-production sample (PPS), delivery date, and packing
requirements. Without all of these, yarn can’t be sourced correctly and machines can’t
be set up.
This is worth flagging for first-time buyers: missing or unclear specs at order
confirmation is one of the most common reasons bulk production gets delayed. If your
factory is waiting on you for a color approval or a size spec, your lead time clock
isn’t running—it’s paused.
Where Most Delays and Defect Risks Actually Come From
The highest-risk stages in the sweater manufacturing process are not the ones that look
the most complex. Yarn lot inconsistency, incorrect pattern engineering, and tension
errors during linking are responsible for a disproportionate share of quality issues and
timeline overruns. These aren’t failures at the knitting machine—they’re failures in
the preparation stages that feed into it. We’ll cover each one below.
Steps 1–3: Yarn Preparation and Pre-Production
These first three steps happen before any machine time is booked, but they set the
ceiling for everything that follows. Rushing them rarely saves time—it usually creates
problems downstream that take longer to fix than the time saved upfront.
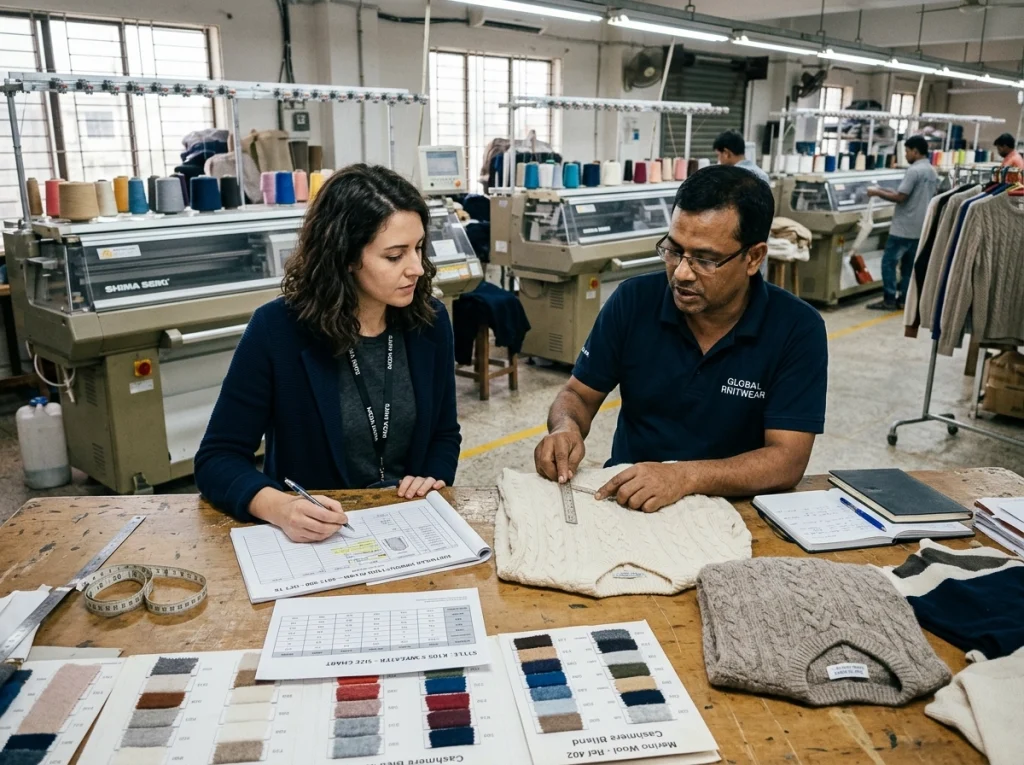
Step 1 — Order Confirmation
This is the factory’s formal intake of your brief. A responsible sweater factory will
not order yarn or schedule machine time until the order is confirmed with a complete
spec sheet and an approved sample. The more complete your brief—including MOQ per color
per size, special construction details, and packaging requirements—the fewer
back-and-forth cycles the factory needs before production begins.
For buyers working through an OEM/ODM service,
this stage also includes aligning on gauge selection, yarn options, and cost targets
before committing to a direction.
Step 2 — Yarn Sourcing and Ordering
Once the order is confirmed, the factory calculates total yarn required by weight—then
orders slightly more than the calculated amount. This buffer is not padding; it’s a
practical necessity. Knitting defects happen, and if a factory runs short and has to
reorder mid-production, there’s a real risk the new lot won’t match the original in
color or hand feel.
Yarn is sold by roll weight, not exact grams, so small overages are standard. A slight
yarn surplus at delivery is far better than a quantity shortfall that brings the whole
production run to a halt.
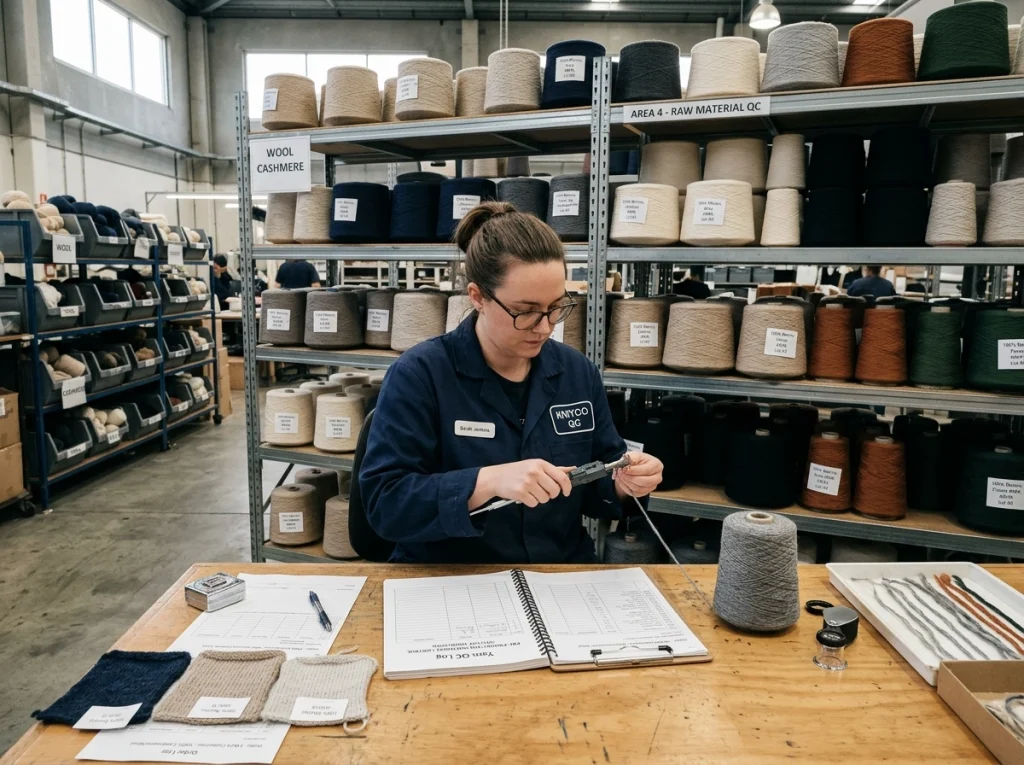
Step 3 — Yarn Inspection and Storage
When yarn arrives at the factory, it doesn’t go straight to the machines. Samples are
taken and tested against the order specs—linear density, color consistency, and
evenness. Yarn that fails inspection goes back to the supplier.
This step is more relevant to buyers than it might appear. If your order uses a
specialty fiber—merino, recycled polyester, cashmere blends—yarn inspection can add one
to two days to the pre-production timeline. Factoring this in when setting delivery
windows avoids the common miscommunication where the factory says production “starts
next week” but the buyer is counting from a different point.
Steps 4–6: Translating Your Design Into Knitted Panels

These three steps convert a spec sheet into actual knitted fabric. Step 4 carries more
risk than most buyers realize—and understanding it changes how you approach the sample
approval process.
Step 4 — Pattern Engineering and Size Grading
This is the technical translation layer between your design and the knitting machine. A
pattern engineer writes out the full production instructions—knitting sequences, stitch
counts, machine gauge settings, size grades across your full size run—in a format
workers and machines can execute.
Any mistake here propagates through every unit in the run. A tension setting that’s
slightly off, or a size grade that wasn’t cross-checked against your fit specs, doesn’t
produce one bad sweater—it produces an entire production run that needs reworking.
Pattern engineers carry significant responsibility and are among the highest-paid
workers on the factory floor.
For buyers developing custom knit projects—
especially those with unusual construction, multiple stitch structures, or bespoke
sizing—this stage deserves careful attention during the sampling review. Confirming that
the pattern document accurately reflects your approved sample is worth the extra day.
Step 5 — Machine Knitting
Once the programming file is loaded, computerized flat knitting machines knit each panel
separately: front body, back body, sleeves, collar, plackets, and additional components
as needed. Operators monitor the machines throughout for tension consistency and stitch
density.
Gauge is where the machine choice becomes a buyer-facing decision. A 7-gauge machine
produces a chunky, textured knit—typical for heavier cardigans
with thick yarn. A 14-gauge or finer machine produces a lightweight, smooth construction
suited to elevated basics or the finer styles in our sweater range.
The higher the gauge, the more needles per inch, the slower the knitting time per panel,
and the longer the production timeline for any given quantity.
Step 6 — Overlocking
After knitting, each panel’s raw edges are overlocked (serged) to prevent unraveling
and create a stable seam boundary before the linking stage. It’s a short step but a
necessary one—panels that skip overlocking tend to develop stitching defects during
assembly that are difficult to fix after the fact.
Steps 7–9: Assembly and Wet Finishing
This is where individual panels become a recognizable garment. Steps 7 through 9 are
also where the highest concentration of skilled hand labor is required—which affects
factory capacity and, by extension, your realistic lead time during the peak season.
Step 7 — Linking (Seaming the Panels)
Linking joins the knitted panels together—side seams, armholes, shoulder seams, collar,
and sleeve attachment—using a circular linking machine. Each stitch is set onto the
machine needle by needle. Sloppy linking shows immediately: uneven tension causes the
garment to pull or distort, and measurements shift as a result.
Tension control during linking is one of the most common sources of size inconsistency
across a bulk run. If your factory is at capacity during the August–January peak season,
linking stations are often the bottleneck. For orders with tight delivery windows, it’s
worth asking your factory about linking capacity before confirming your timeline—not
after.
Step 8 — Hand Stitching
Some seam areas can’t be closed by machine—particularly at the collar join, certain cuff
finishes, and specialty closures. These are completed by hand: waist tape removal,
trimming, picking loose yarns, and bumping (a final hand-shaping of edges before
washing).
This step is less visible in cost discussions but meaningful in labor time, especially
for styles with complex necklines or embellishments. For orders combining multiple
construction types—a zip-knit hoodie alongside a standard crew neck, for example—hand
stitching time will differ per style and needs to be factored into your production
schedule.
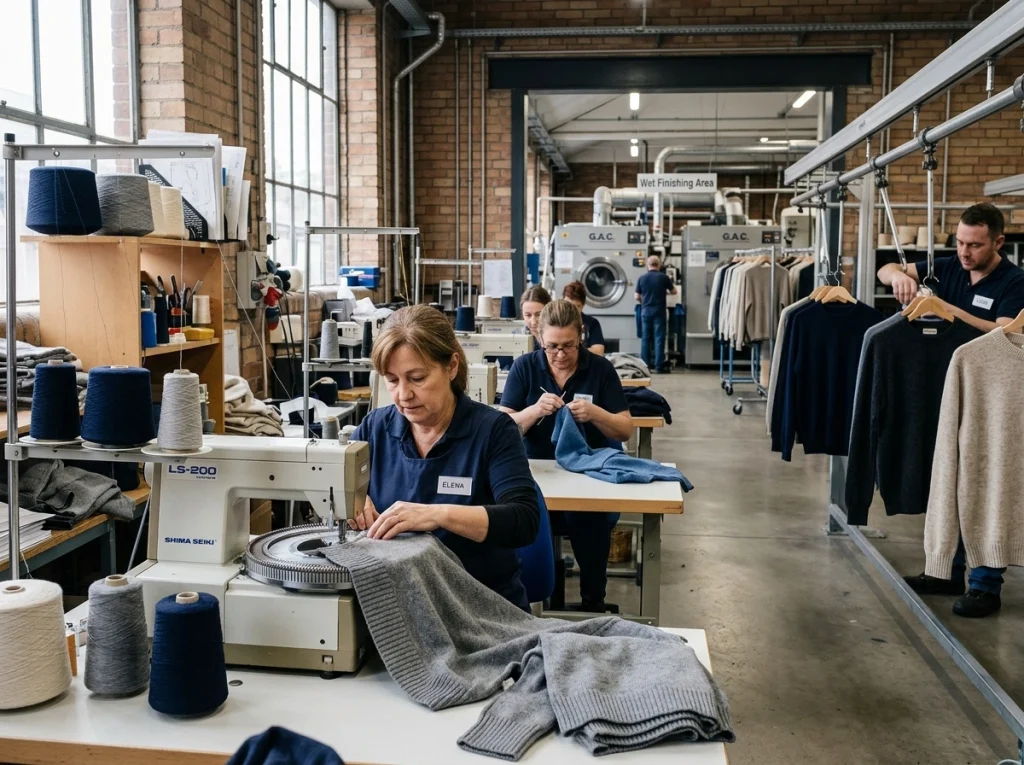
Step 9 — Garment Washing
Assembled garments are sent to a professional washing facility. This isn’t just
cleaning. Garment washing removes production oils and processing residue, stabilizes
hand feel, controls softness and drape, and pre-shrinks the garment so that finished
measurements hold after end-consumer laundering.
Wash treatment directly affects how a garment feels on arrival—a critical but often
underspecified element in buyer briefs. If you’ve received sweaters that felt noticeably
stiffer or softer than the approved sample, the wash formula is usually where the
deviation originated.
Steps 10–12: Shaping, Final QC, and Packing
The last three steps take a garment from assembled and washed to retail-ready and
shipped. Each has direct implications for buyers receiving goods at their warehouse or
retail locations.
Step 10 — Ironing and Blocking on Templates
Sweaters are not ironed flat the way woven garments are. After washing, knitwear
shrinks and loses its shape. Each piece is placed onto a wooden or metal template cut
to the exact finished measurements, then steamed into shape. This is how the factory
ensures that the chest width or body length on your spec sheet is what actually arrives
in your warehouse.
Template accuracy matters when your customer base has narrow size expectations. If
templates are worn or improperly maintained across a long production run, measurement
drift accumulates unit by unit. It’s a reasonable thing to ask about when auditing a
new factory.
Step 11 — Labeling
Care labels, size labels, and neck labels are attached using a flat-bed machine per the
buyer’s specifications. The step itself is straightforward—but the consequences of
errors are not. Incorrect label placement, missing fiber composition or wash
instructions, or mismatched size labels on cartons create immediate compliance problems
at customs or on the retail floor.
For buyers shipping into EU or US markets, label specs should be finalized and signed
off well before bulk production begins. Treating labeling as an afterthought during
packing is a common source of last-minute delays.
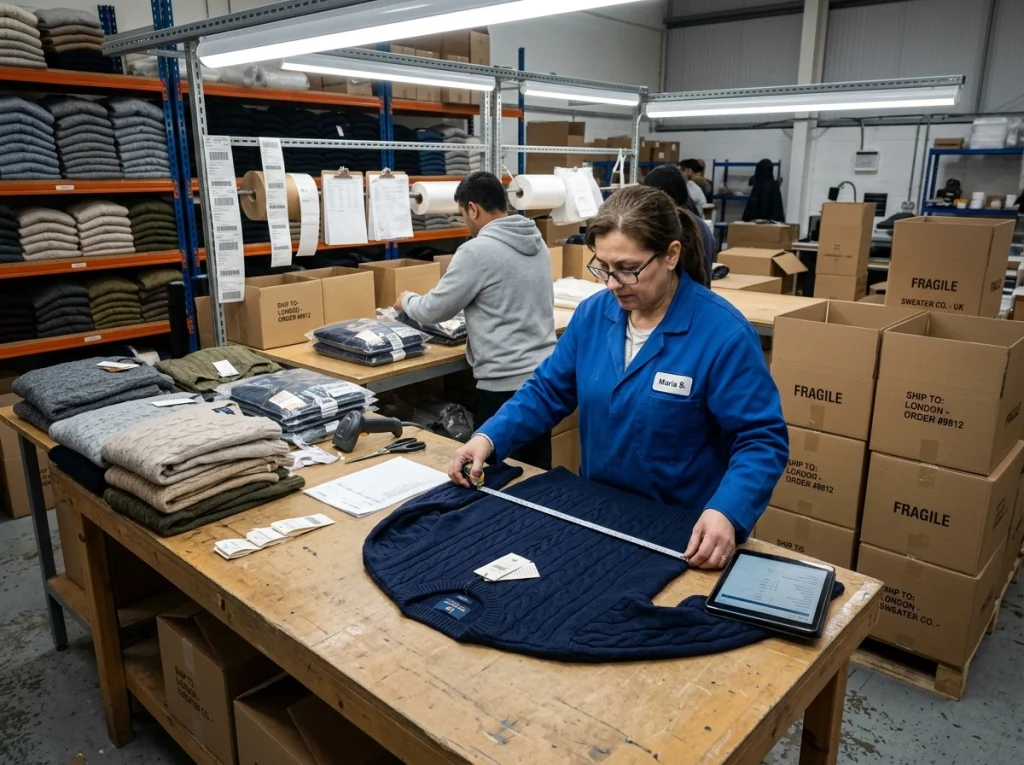
Step 12 — QC Inspection, Mending, and Packaging
Final QC involves light-table inspection—particularly important for dark colorways like
black, navy, and dark green, and for fine-gauge sweaters above 14GG where small holes
or dropped stitches aren’t visible to the naked eye. Garments that fail inspection go
to mending. Those that can’t be repaired are scrapped.
QC at this stage also includes measurement verification against the approved spec sheet,
color consistency checks under standardized lighting (D65, TL84, UV), and elasticity
testing at hems, necklines, and cuffs. Garments that pass are packaged per the buyer’s
requirements—flat fold or hanging, individual polybag, swing tags—then packed into
cartons with shipping marks, style, color, size, and carton numbers clearly labeled.
What This Process Means for Your Lead Time and MOQ
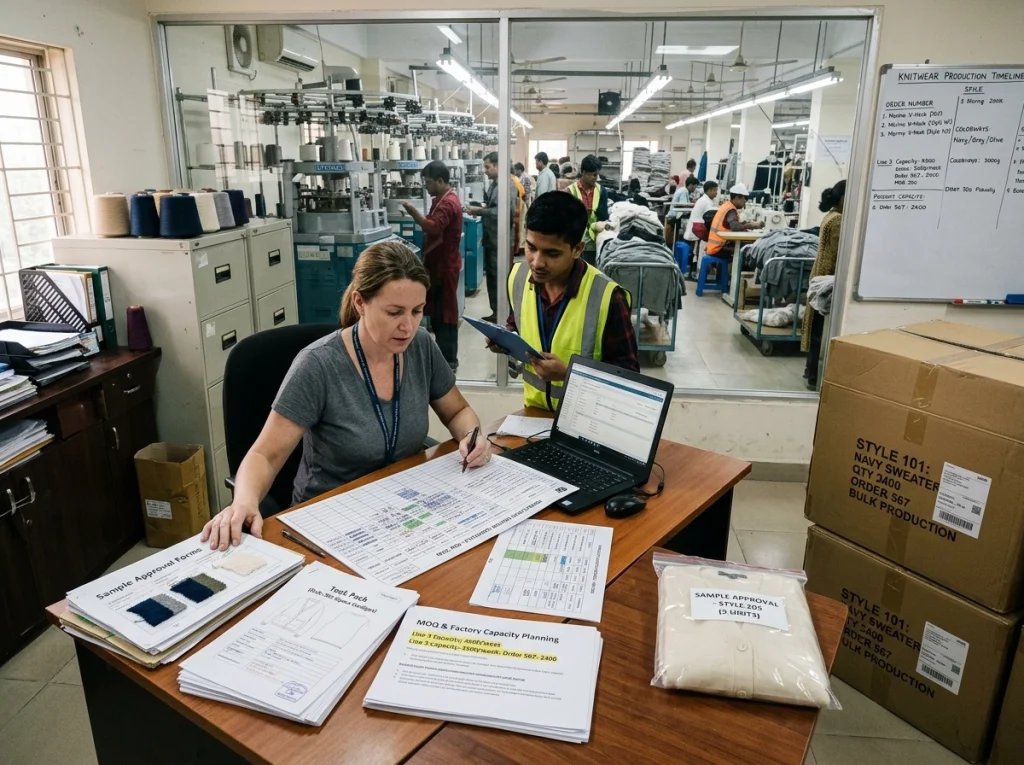
Most of the 12 steps have to run sequentially. You can’t link before you knit, and you
can’t wash before you link. This is why sweater lead times are consistently longer than
woven garment sourcing, and why buyers who don’t account for this tend to end up in
rushed production situations that compromise quality.
A realistic timeline for a standard bulk order breaks down roughly like this:
- Sampling: 3–5 working days for the sample, plus 5–7 days shipping to your
location - Pre-production (Steps 1–4): 3–7 days, depending on yarn availability and style
complexity - Bulk production (Steps 5–12): 15–25 days for most standard styles; longer during
the August–January peak season when linking and finishing capacity is tighter
MOQ at most Chinese knitwear factories starts at around 30 pieces per color per size—
enough for a style test or a small seasonal run. Larger quantities allow multiple
machines to run the same style at the same time, which is why both unit cost and
production speed improve with scale.
If you’re introducing a new style for the first time, build in one complete
sample-and-approval cycle before bulk production begins. Attempting to compress sampling
and bulk into the same window is the single most common source of first-order delays.
Conclusion
Making a sweater involves more steps, more sequential handoffs, and more specialized
labor than most apparel categories buyers work with. Each of the 12 stages described
here has a clear purpose—and skipping or compressing any of them produces predictable
consequences, whether that’s a yarn lot mismatch at Step 2, a sizing error embedded in
Step 4, or measurement drift accumulating through Step 10.
From a factory perspective, the buyers who get clean bulk production and consistent
on-time delivery share one trait: they understand the process well enough to ask the
right questions, and they provide complete specs at order confirmation rather than
finalizing decisions mid-production.
If you’re sourcing a new knitwear line or looking to build a more stable supply
relationship, cnsweaters.com covers everything from standard
pullovers to complex custom developments. Share your tech pack, target price, and
delivery window—and we’ll give you a straightforward assessment of what’s achievable.
FAQ
Q: How long does the full sweater manufacturing process take from yarn to shipment?
Bulk production alone typically takes 15–25 working days from the start of knitting to
cartons ready to ship. Adding pre-production (3–7 days) and a sample approval cycle (3–5
days for the sample plus shipping time), a realistic total window for a new style is
often 5–7 weeks from confirmed order to goods on the water. During the August–January
peak season, add buffer for tighter capacity at the linking and finishing stages.
Q: What is a typical MOQ at a sweater factory in China?
Most factories set MOQ at around 30 pieces per color per size for standard styles. This
is low enough for a seasonal trial or a new-style test. Complex styles, specialty fibers,
or custom stitch development may require higher quantities to be practically cost-effective
—it’s worth discussing the specific style before assuming standard MOQ applies.
Q: Why do sweater samples take longer and cost more than woven garment samples?
Sweater samples follow the same production sequence as bulk—same machine setup, same
pattern engineering, same linking and hand stitching, same washing. There is no
shortcut for producing one or two pieces. In bulk production, the setup cost spreads
across hundreds of units. In sampling, it concentrates into a single garment, which
makes the per-unit cost significantly higher than it looks relative to the bulk price.
Q: What causes measurement inconsistency across a bulk run?
The three most common sources are linking tension variation (Step 7), template wear
during ironing and blocking (Step 10), and size grading errors in pattern engineering
(Step 4). QC measurement checks at multiple production stages are the main control
mechanism. If you’re consistently receiving bulk with sizing outside tolerance, asking
your factory which QC checkpoints are active—and at what frequency—gives you a clearer
picture of where the problem is occurring.
Q: When is the best time to place a sweater production order with a Chinese factory?
February through July is the off-season for most Chinese knitwear factories. Yarn
prices tend to be more stable, machine and linking capacity is more available, and lead
times are more predictable. August through January is peak season—prices rise, capacity
fills quickly, and smaller orders may be deprioritized. For autumn/winter or holiday
collections, placing orders before September gives you the most flexibility on both
price and timing.
External References
- Imily Clothing — Sweater Manufacturing Process: Complete Guide —
https://imilyclothing.com/sweater-manufacturing-process/ - Knitwear.io — OEM/ODM Knitwear Production Process —
https://knitwear.io/oem-odm-knitwear-production-process/ - Guoou Fashion — How Yarn Transforms Into Sweaters at Guoou Fashion —
https://guooufashion.com/how-yarn-becomes-sweater-in-a-sweater-factory/ - CottonWorks — Sweater Manufacturing Basics —
https://cottonworks.com/learning-hub/sweater-manufacturing/sweater-manufacturing-basics/